I have moved my blog to https://moonlightwoodworker.wordpress.com.
As a Google user, the integration with other Google services and Blogger offers a few conveniences that other blog service do not, but I have always been frustrated with not being able to put pictures side by side using this platform. I've done it by editing HTML code, but that shouldn't be necessary. And while Wordpress doesn't do it natively either, I can at least create a picture gallery that does what I want. I've used the full version of Wordpress in the past and I may eventually go that route again, but for now the free Wordpress.com option is good.
So, if you wish to continue to follow my thoughts and pictures they can be viewed at the link above and will no longer continue to be published here.
I hope to see you there,
Jim
Friday, March 6, 2015

Wednesday, December 31, 2014
Making a king sized headboard - final
When I was purchasing the wood for this project over the summer the couple I visited asked me what I would be making as we started chatting about woodworking as a hobby. I mentioned fiddling with projects in my basement at night for a few hours a week and quipped that the headboard would probably be done around Christmas. It was placed in our bedroom on Dec 29th.


Sunday, November 30, 2014
Making a king sized headboard - Part 5
With the frame and trim complete there are only a couple steps left. Namely, create the panel and apply finish. This may be over simplified. The panel includes a plywood back, furniture foam and vinyl. I'm thinking the panel assembly with be similar recovering a padded seat, which I've done. The finish will consist of stain and some form of a sealer, which I haven't settled on yet.
We hadn't yet decided on a color for the vinyl so I opted to do the stain. I went with Minwax's Red Oak hoping it matched the bedroom furniture. I chose the liquid version over the gel. I've found that the gel doesn't penetrate as well and is more of a mess than it is worth, especially if it is left to dry for too long while hoping time helps it seep in to the wood. Wiping on the liquid is quick and predictable.

We hadn't yet decided on a color for the vinyl so I opted to do the stain. I went with Minwax's Red Oak hoping it matched the bedroom furniture. I chose the liquid version over the gel. I've found that the gel doesn't penetrate as well and is more of a mess than it is worth, especially if it is left to dry for too long while hoping time helps it seep in to the wood. Wiping on the liquid is quick and predictable.
Monday, November 24, 2014
Making a king sized headboard - Part 4
With the frame of the headboard assembled it was time to embellish and add the components that will tie the design to rest of the furniture in our bedroom. The original bedroom set included the headboard, two bureaus a mirror and night stand. The remaining pieces all have a similar profile at their top that includes a cap and angled molding. The angle is different on each piece but they all have the same structure.
The cap was easy, just a straight board ripped to length and width. The hardest part was dialing in the length and width, which had to over hang the molding equally on the front and sides by an eye pleasing and similar-to-the-existing-furniture amount. About half an inch, maybe a bit less.
I marked out the molding's profile on the end of a board and colored in the area to be kept.

The cap was easy, just a straight board ripped to length and width. The hardest part was dialing in the length and width, which had to over hang the molding equally on the front and sides by an eye pleasing and similar-to-the-existing-furniture amount. About half an inch, maybe a bit less.
I marked out the molding's profile on the end of a board and colored in the area to be kept.
Tuesday, November 11, 2014
Making a king sized head board - Part 3
I hadn't realized just how long it has been since I last updated the blog. To my loyal followers (both of you), I apologize. Progress has been slow but steady, and I found myself dragging my feet on some of the components I was less familiar with, afraid to mess up what I completed so far. The firsts on this project were cutting rabbets using a dado stack, making my own molding and cutting miters in that molding.
All of the joinery for the frame has been completed and much of it was cut by hand. With a few mortises under my belt I am becoming more comfortable with digging them out on the drill press and cleaning them up with chisels. I wussed out on the tenons and cut further away from the lines than I should have. This left lots of cleanup before final fitting.

All of the joinery for the frame has been completed and much of it was cut by hand. With a few mortises under my belt I am becoming more comfortable with digging them out on the drill press and cleaning them up with chisels. I wussed out on the tenons and cut further away from the lines than I should have. This left lots of cleanup before final fitting.
Wednesday, September 24, 2014
Making a king sized head board - Part 2
I like working with rough lumber because I get more of a sense of freedom working with raw materials. I have the luxury of doing so mostly because I have a thickness planer, which doubles as a jointer when using a jig. I did not have that luxury this time around.

Monday, September 15, 2014
Local wood from a local sawyer
The time has come to build some new furniture for the new house. The item at the top of this list is a headboard. When we replaced our queen sized torture device with a king sized "sleep surface" the old head board went to the basement and eventually to craigslist.
The bedroom set is craftsman style made of a feau oak (foak?). Regardless, it looks nice, is damn heavy and we have no intention of replacing it. I'm the only one who notices the long grain where there should be end grain on the tops of the night stands and dressers.
The bedroom set is craftsman style made of a feau oak (foak?). Regardless, it looks nice, is damn heavy and we have no intention of replacing it. I'm the only one who notices the long grain where there should be end grain on the tops of the night stands and dressers.
Thursday, August 28, 2014
Refinishing a storage bench with milk paint
I recently took a detour from my woodworking projects and refinished a storage bench. My wife picked this up not long after we moved in to the house last winter with the hopes that I would repaint it. This honey-do item was bumped to the top of the list a few weeks ago and while not really a wood chip making or joinery cutting type project, it gave me an opportunity to try out milk paint which will most likely be a finish of choice on a future piece.
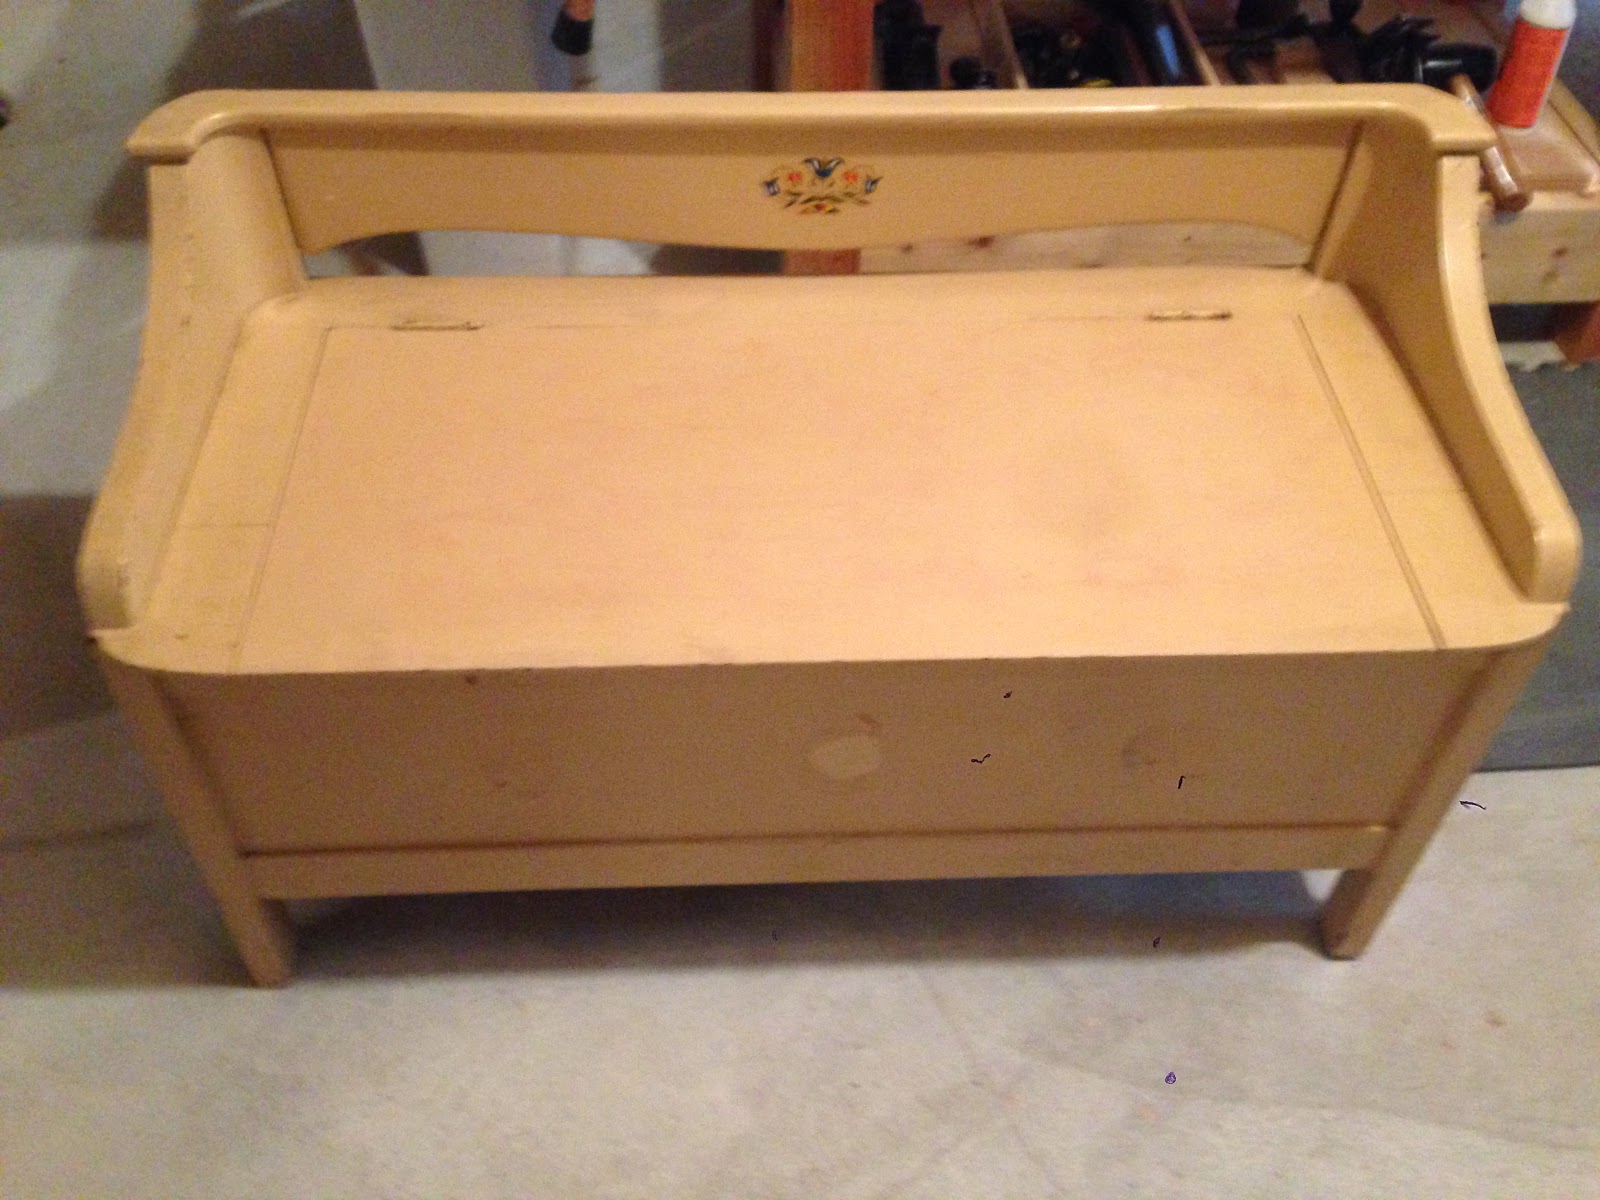 |
| Antique store find |
Sunday, July 13, 2014
The completed bench
Finishing the bench was bitter sweet. In this case the journey was at least as good as the destination. The build offered me some firsts such as mortise and tenons (draw bored no less), flattening by hand, using winding sticks and overall a significant amount of hand tool use. The result is a flat bench top and a stout vise, both of which are major upgrades over my old bench.

Monday, June 16, 2014
All your base...
I put the final drop of glue and a few screws in the base of my bench last night. The completed assembly is rock frickin solid. The joinery consists mostly of mortise and tenons, which attach the stretchers to the legs and the legs to the bench top. I used a few screws to reinforce the bench top attachment, but I don't think they were needed.
All the tenons were cut by hand and the mortises were roughed out at the drill press or by cordless drill and squared up with chisels. I won't get in to the construction details that have been blogged about by a myriad of other woodworkers, instead I'll let a few pictures do the talking.

All the tenons were cut by hand and the mortises were roughed out at the drill press or by cordless drill and squared up with chisels. I won't get in to the construction details that have been blogged about by a myriad of other woodworkers, instead I'll let a few pictures do the talking.
Saturday, May 10, 2014
Bench top bottom
Just a quick update on the progress of my upgraded bench top. Based on the advise of +Shannon Rogers I stopped planing the edges of the tewbafores and just face glued them all together. Planing them as a single piece certainly makes more sense. Thanks again, Shannon.

Wednesday, April 30, 2014
So many moving parts
You know that game where you have to re-arrange tiles to complete a picture and there's only one open space to maneuver? That's what the process of putting a shop together in my basement feels like.

Tuesday, March 4, 2014
The shop begins to take form
So we've been in the new house for a little over two months now. In that time I've painted two rooms, hung curtains, replaced a light fixture, done a little weather proofing and dispersed a couple feet of snow. Getting to the basement and setting up shop always lost the battle of priority until this past Saturday when I finally had some time to make a little progress down there.
On moving day the basement became the catch-all for anything we couldn't quickly find a home for. We were paying movers by the hour and all I really wanted was our stuff off their truck before they started to get tired and slow down. This was the result.

On moving day the basement became the catch-all for anything we couldn't quickly find a home for. We were paying movers by the hour and all I really wanted was our stuff off their truck before they started to get tired and slow down. This was the result.
Saturday, January 4, 2014
Moving slowly
It's been over a month since my last update. My apologies to the small, yet faithful, group of readers of this blog. I'm sure your lives have gone unfulfilled and for that I am truly sorry. Huh.
I am writing, sitting at our desk in our new house. We moved in ten days before Christmas and by Christmas Eve my wife had the house looking liked we've lived here for years. We had her family over that night and had a great time, without a box in sight.
I am writing, sitting at our desk in our new house. We moved in ten days before Christmas and by Christmas Eve my wife had the house looking liked we've lived here for years. We had her family over that night and had a great time, without a box in sight.
Tuesday, November 26, 2013
I have a confession to make...
I really like Arts and Crafts style furniture (that's not the confession). It appeals to me in a way that I like most things in my life to be - simple and clean. It appeals to me even more since life with young boys is rarely ever simple or clean. We have a Morris style chair that might possibly be the most comfortable chair in our house (err... most comfortable chair in storage). My wife and I ooh and aah over mission style dining room furniture.
This blog post, and my confession, is the result of watching the Fine Woodworking video series on making an Arts and Crafts Glass Front Cabinet which has proved to be the tipping point of my pent up guilt. The design of FWW piece is beautiful and I am looking forward to someday building something with glass in its cabinet door, but I'm torn on the material used throughout much of the style.

This blog post, and my confession, is the result of watching the Fine Woodworking video series on making an Arts and Crafts Glass Front Cabinet which has proved to be the tipping point of my pent up guilt. The design of FWW piece is beautiful and I am looking forward to someday building something with glass in its cabinet door, but I'm torn on the material used throughout much of the style.
Tuesday, November 12, 2013
Greetings from Siberia
Cramming my wife and two kids in with my mom hasn't been as bad as I anticipated and there's light at the end of this tunnel. It has already been one month since we invaded her home (aka the Siberia of woodworking) and it will be another month before we make it to our final destination. One of my favorite features of the new house is the clean, dry and unfinished basement and future home of my car-less workshop.
Since I'm not actively woodworking I've had time to plan out the new shop. I took pictures of the basement with the current owner's stuff in it with the intent of putting them in this post, but it was recommended against doing so. Damn wife and her probably-a-good-idea. This layout from Grizzly's tool will have to suffice.

Since I'm not actively woodworking I've had time to plan out the new shop. I took pictures of the basement with the current owner's stuff in it with the intent of putting them in this post, but it was recommended against doing so. Damn wife and her probably-a-good-idea. This layout from Grizzly's tool will have to suffice.

Wednesday, October 2, 2013
Two chairs completed
The heavens are open and angels sing for on this day (a week or so ago, actually) two chairs were finished. AaAaAaAhhhhhhhh. I'm not going to go in to just how long it took to complete them, but let me say this, it feels good to be done-ish.
|
|


Tuesday, September 10, 2013
Go west young man.
I haven't shared this personal tidbit on my blog yet, or anywhere online for that matter. I haven't wanted to jinx anything. My wife and I put our house on the market earlier this year. Our goal is to move one town away to where I grew up, where much of my family is, to get our kids in to a better school system and to where we should have bought a house when we bought this one six years ago.
Friday, August 16, 2013
Dovetail semi-frequently
The lure of hand work is seated deeply in my cheek and my most recent woodworking crush is on learning how to cut dovetails. But before I get to that, a little about how I got sucked in.
It all started with buying a #5 bench plane off ebay. Then I learned how to tune it up by watching +Christopher Schwarz's video on how to do so. For Christmas I received a basic set of chisels and a Lie Nielsen low angle block plane. Rob Cosman and Chris Becksvoort showed me how to cut dovetails. +Shannon Rogers showed me how to fix them. For my birthday, a Veritas dovetail saw. I am reading Garret Hack's The Handplane Book and Jim Tolpin's The New Traditional Woodworker. I pre-ordered +Marc Spagnuolo's Hybrid Woodworking. I have a hundred year old #4 and #7 waiting for some love. What's next, bluegrass playing in the shop? Oh wait, I already love bluegrass.

It all started with buying a #5 bench plane off ebay. Then I learned how to tune it up by watching +Christopher Schwarz's video on how to do so. For Christmas I received a basic set of chisels and a Lie Nielsen low angle block plane. Rob Cosman and Chris Becksvoort showed me how to cut dovetails. +Shannon Rogers showed me how to fix them. For my birthday, a Veritas dovetail saw. I am reading Garret Hack's The Handplane Book and Jim Tolpin's The New Traditional Woodworker. I pre-ordered +Marc Spagnuolo's Hybrid Woodworking. I have a hundred year old #4 and #7 waiting for some love. What's next, bluegrass playing in the shop? Oh wait, I already love bluegrass.

Tuesday, July 23, 2013
Ahh... sh*t
I had a couple of those moments in the shop last night. That moment when you realize that the stupidity that lays before you came from your own hand.
The first one I can chalk up to a learning experience. I don't know where you live, but chances are if you live eastern part of the US you've experienced prolonged, high humidity over the past couple of weeks. I know that humidity + metal tools = rust and I watch the weather forecasts. I knew the humidity was coming. I prepared the tools that are too big to move out of my garage with a fresh coating of wax.
Tonight, I moved some work pieces that I placed my table saw shortly after the waxing and found this.
The first one I can chalk up to a learning experience. I don't know where you live, but chances are if you live eastern part of the US you've experienced prolonged, high humidity over the past couple of weeks. I know that humidity + metal tools = rust and I watch the weather forecasts. I knew the humidity was coming. I prepared the tools that are too big to move out of my garage with a fresh coating of wax.
Tonight, I moved some work pieces that I placed my table saw shortly after the waxing and found this.
 |
| My table saw had never experienced rust before this. |
Subscribe to:
Posts (Atom)